Viewing and Editing Items
Opening an Item
There are several ways for us to open an item to view or edit it.
Clicking the Icon
We can click on the item's Icon. This is a small image on the far left side of the item row.

Clicking the Title Column
We can also press the title field of the item. The title of an item is emboldened, and an underline will appear when your mouse hovers over it.
![]()
Selecting Multiple Items
Rapid Platform allows you to select multiple items at once. This allows you to use a button from the Command Bar, and apply its commands to multiple items.
- Read about how to select multiple items in a Table
Fields and the Item Page
Note in the screenshot below that once we open an item, the item's data is no longer arranged as columns. This is called the Item Page, and it is the main method for users to edit data on an item.
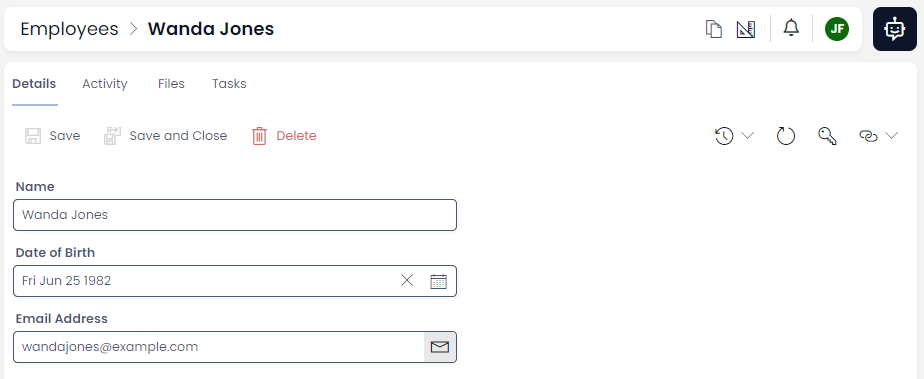
You will notice that the Columns we created (Name, DOB, and Email) have changed appearance. These boxes, where data can be typed or entered, are called Fields. All columns created by your system administrator can appear as a Field.
This is also where any fields that may have been hidden from view in the table can be viewed and edited.
Saving Changes
Any changes made to an item will need to be saved before they will take effect. To save the changes to an item, press the Save button, or the Save and Close button in the Command Bar.
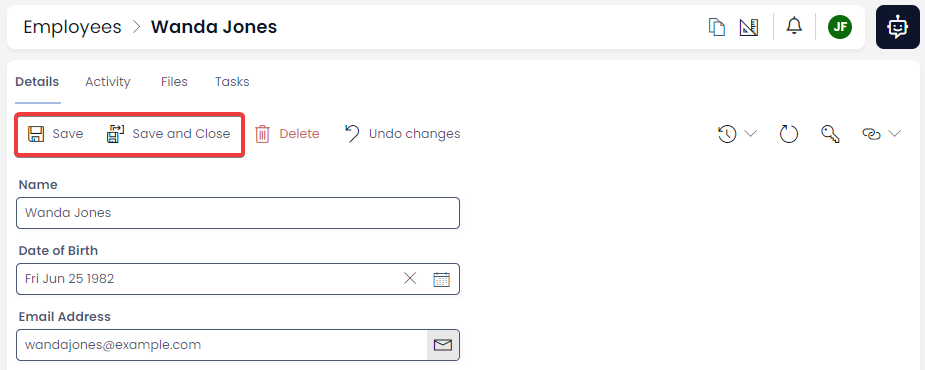
Your system administrator can also ensure that certain menu actions will prompt you to save your changes before you are navigated to a different page.
Updating Subqueries & Computed Fields
The Subquery and Computed fields of a Rapid item are unique, in that they must be refreshed before any changes to their contents appears. This is because these fields must execute code to calculate what data they should display. When the contents of an item changes, this means the code may need to be run a second time for the changes to appear in these types of fields.
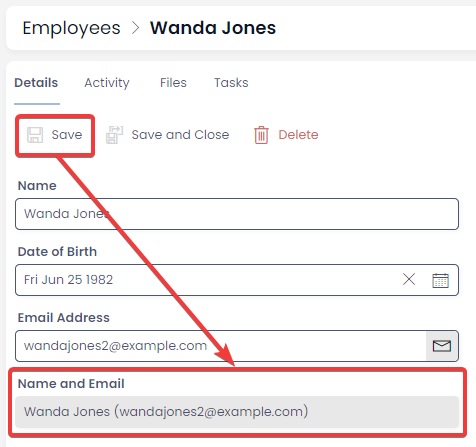
For example, we could have a Computed Field that combines the Name of an Employee, and their Email address.
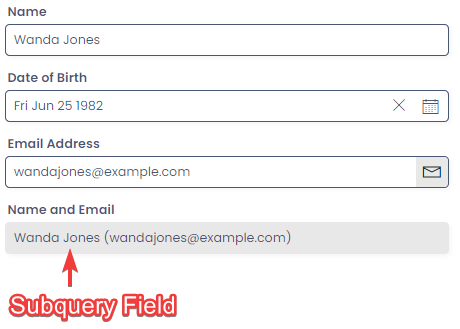
Subquery and Computed Fields are visually distinct from other fields on an item: they will always have a grey background, and will not allow a user to edit their data directly.
Note that in the screenshot below, we have changed the employee's email address field from wandajones@example.com to wandajones2@example.com, however, this change is not seen in the Subquery field.
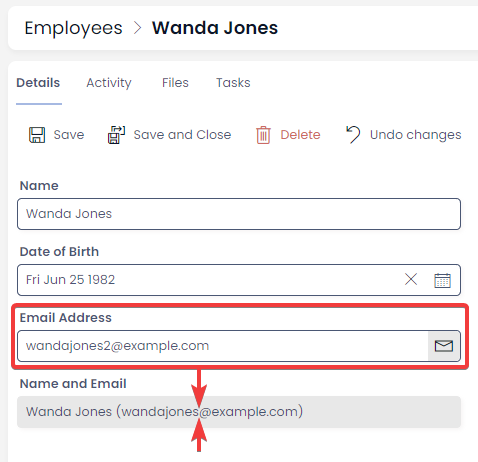
If we press Save, however, the Subquery field runs its internal code again and recalculates the value it should contain. Now, the new data is displayed in the subquery field.
Items can be Refreshed
If the data in an item is updated (e.g. by another user, or by an automated process), the item will need to be refreshed in order for that data to become visible.
Rapid Platform includes an Inline Refresh button, that allows you to refresh all the items in an item, without leaving the page. The Inline Refresh is located in the Command Bar, and has an icon that resembles a clockwise arrow.
